Showing posts with label sewing. Show all posts

Tuesday, 31 March 2015

Quilt


Well now.  I made a patchy-work quilt!  It's not a traditional one, with fantastically precise geometry, but kind of a wildly modern one of mismatched and layered patches.  Gee's Bend is not where I live, obviously. 

In the process, I've learned quite a lot.   


Firstly, I love fabric.  I love pattern.  I love color.  Really, I do!  No matter that I strive to have 100% black and monochrome wardrobe.  What is available to you now at any well-stocked fabric store is amazing, and these designers always release collections that work so eccentrically well together.  This was a collection of fat quarters I had picked up here and there for the past year, almost always heavily discounted as last year's pattern collection.  Liberty, Westminster Fabrics, Rowan, Amy Butler.  I went for blues-greens-yellows in various electric shades and amassed enough to start thinking about a project that would take up more fabric than a tote bag.  Originally, I had no real desire to quilt, as it seemed like a process that would be taking me down quite the rabbit hole.  Whatever, I did it anyway.  It's not like I'm going to be sitting by the fire and hand-stitching this.

The original pile of scraps

I chose a pattern for the quilt top in Amy Butler's In Stitches book and roughly followed it.  She called for bigger chunks of fabric; I pieced together fat quarter pieces until I got the patch dimensions right, sometimes sewing together several lengths of scraps to get where I needed to.

Stitched-together quilt top

I don't have a long-arm sewing machine, so I figured a full-sized quilt top would be easiest to deal with since feeding the entire quilt through the tiny gap allowance on my Singer was anxiety-inducing.

Rather weirdly, in the Amy Butler pattern, she has you sew the quilt top pieces onto muslin backing.   From everything else I read about quilts, I found nothing about doing that technique, and I just sewed the quilt top together.  That ended up being the easiest step.

Once I had that done, I found 4.5 meters of fantastically contrasting fabric for the backing- a geometric print in similar blue-greens from Westminster called "Summer Tweed", and some lightweight cotton-poly blend quilt batting.  Or wadding, as they call it in the UK.  

So the basic quilting 101 theory is this (in case you are a complete amateur like me):  you need to make a sandwich with the backing, the batting and the quilt top.  You pin it all together (or you can sew about a thousand tailor's tacks to hold it together).  Preferably with safety pins if you choose to pin.  I did not.  Feeding a quilt with a hundred pins holding it together through the machine led to blood.  It was mine.  I pricked my hands constantly before I wised up to why the instructions specified safety pins at this point.    

et voila!  a finished quilt

 With your layers sandwiched together, you sew around all your patches.  Once it's secured, you can figure out your quilting lines- the decorative stitching on top that will secure the batting in place so you don't end up with it bunched up in every corner, and to add interest to the quilt top.

This was the hardest part for me.    There was much rolling and turning and pushing and pulling to get all the quilt lines down.  I tried to start in the centre and work my way out, and just did alternating sections of vertical and horizontal stripes either 1" or 2" apart.  This step took days, and a few days more of the quilt being in time-out as I learned to walk away.


My biggest problem was the thread.  I chose, after much deliberation, a light weight cream thread in 100% poly.  At first, I thought an acid lime green would be just wonderful, but after realizing my quilting lines might be quite imperfect, I decided to go with the subtle.

However.

I had so many problems with this thread and tension.  It was maddening.  Next time, I'll choose a thicker thread.  Almost every time I stopped the machine, or even paused, the thread would manage to wind around the bottom bobbin and I'd have to stop, clip the threads, untangle and re-thread every single time.  It just wasn't right.  I also ended up ripping back quite a lot once it was done to fix spots where the tension was wonky enough to make it look sloppy.


The other thing I really struggled with was the bias tape.  I hate picky-picky work like that (I normally just go out and BUY the stuff, pre-folded), but I used the leftover meterage from the quilt back to tie the edges together with homemade bias tape.  It went...a bit sloppy.  I had to go around the entire quilt a second time as the front and back of the tape ended up not always keenly matching up.

So yes, this did cause me a bit of pain and suffering.  No, it's not quite big enough to cover a queen-sized bed, and it won't be winning any prizes at the county fair, unless the county population is exactly 1.  But look- it's all my favorite scraps of fabric, all haphazardly stitched together in a nice summer-weight blanket.  It's functional, I swear it!  I don't know if I'm jumping on the quilting bandwagon any time soon, but it was a really nice way to teach myself and understand the technique, and a good excuse to start hoarding more fabric scraps.


I love it despite its imperfections.

Thursday, 26 February 2015

A Quilt Named Patchy

An impending disaster?

Perhaps.

I have a nasty fat quarter habit.  Any time I see a bright and lovely bit of luxe cotton fabric packaged neatly with other bits of coordinating fabric, it comes home with me.  While I usually have enough for small projects- bags and throw pillow covers- I decided to go whole-hog and make a quilt.


I haven't quilted before, but I think I understand the theory.  Or, perhaps, ignorance is bliss.

I found some Rowan and Amy Butler fabric on sale recently and pounced on the bin. I had a rough idea of a pattern and decided to go with blues and greens- vibrant and lovely- and matched it with some other scraps from Kensington and Liberty that I've been saving up from various projects and clearance sales.  I had decided that I didn't want anything too matchy-matchy or geometric.  This thing would be all over the place (the better to hide mistakes!).


A couple of books and youtube videos later and I had cut the pieces and laid it out-  I found a pattern from Amy Butler's book "In Stitches" that I followed roughly for the quilt top.  I had to patch together some scraps to make all the pieces fit, as this pattern called for bigger chunks of fabric and I had mostly fat quarters to work with.  Hopefully this will be my summer blanket, as I don't have one and last summer I just used the duvet cover sans duvet as a blanket.  How uncivilized!

Most people who quilt seriously seem to have a "quilt wall"- a tacky bit of fabric on the wall where they can arrange their pieces, stand back and admire it and arrange the squares as needed.  I slummed it and used the bed.


Everything is pieced together, and I've pinned some more scraps on top as overlays.  I've ordered some cotton wadding and found a big 4.5 meter piece of contrasting fabric (on sale!) for the quilt back and edging.  Once I get the wadding, the whole thing will be sandwiched together and quilted on my standard Singer.  Somehow, I'll make this work even though I don't have a special "long arm" machine that would allow more fabric to be rolled up and fed through the machine.


This is TBC....it might be the lumpiest and most unsightly quilt ever, but I won't know until I give it a try.   The suspense is killing me.  

Tuesday, 1 July 2014

FO: Betsy Ross Dress

You guys, I finished a sewing project!

Actually, I finished this months ago, which isn't bad considering I had started this last summer in Paris.

While I enjoy making things, sewing is just not as pleasurable as knitting.  Maybe it's all the jumping around I have to do- from table to iron to machine to hand basting to iron and back.  Maybe it's the loud mechanical machine aspects of it, and being bent over said machine.  I don't know, I just have a hard time sitting down and sewing something in a timely manner.  Sewing projects can drag out for months until I'm sick of looking at it and just finish it already.  Sigh.


An easy, cute dress pattern is my favorite thing.  One that you can do endless variations of.  I had bought this pattern years ago at Brooklyn General, before I even owned a sewing machine.  I think I sent it up to my mom, who eventually sent it back to me, so when I finally bought a machine in Paris, I sat down and started making cuts.  The pattern has since been discontinued.  If you can find it, nab it.  The instructions are really clear and easy, with good diagrams and explanations and tips throughout.  I usually require a bit of hand-holding in my sewing, with lots of looking up videos on the youtube for techniques and clarifications.  This, I didn't.

Forgive the pictures, it was early and my hair was wet from the shower.


The fabric is a gorgeous woven silk that I picked up at one of the fabric stores clustered around Sacré Cœur.
 

It needs to be pressed as it's been jammed into my closet for a bit, but it fits, and its cute.  Totally wearable summer dress.  I probably could have styled it a bit better here, but I was just rushing out the door.  Late, as usual.  Oh, and that SPF 50 is working wonders, don't you think?  

Saturday, 17 May 2014

Favorite jeans are now a favorite skirt, PLUS bonus crochet action

Oh, the horror of it all!

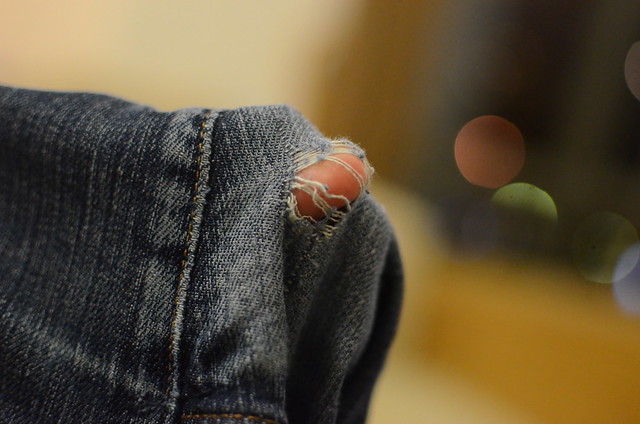
019

Granted, I've had these jeans for years.  Still.  That's heartbreaking.  The first place where my jeans wear out and skin pokes through is always because of my enormous, earthquake-inducing thunder thighs.  I have to be careful when I run in some synthetics as they will just heat up and melt into my skin, or occasionally ignite into an impressive conflagration.  Damn you, thighs.  

I actually don't wear jeans too much- when I'm gardening or horseback riding or painting.  They are generally just clothes to get dirty in.  I try to find a pair that fits well with a darker, dressier wash, and these were it for me for years.

Sigh.

What to do?

Turn them into a jean skirt, of course.  My biggest problem with buying off-the-rack ones is they never fit me quite right- always too snug through the hips or too big through the waist, or some other weird combination of unflattering, and I'm tugging at it or feeling like they are riding up constantly.  Why?  Because they don't fit like jeans.  The belt loops are never the right size to actually fit a belt.  That's why I love this pattern (if you want to call it that).  You are taking something that fits you like a glove, and turning it into a skirt.

First....the cut.

023

I cut the inseam out.  You could do this with a seam ripper and re-stitch, but the inseam was pretty frayed and starting to get holes, so I just sliced them up.  Also, less bulk to try to sew over.

020

Then, decided how long you want your skirt to be.  A really cute (although slightly hippie look) is to sew in a panel of fabric and you'll have a long, multi-media jean skirt.  I, however, thing that knee length looks best on me, so I cut a couple inches below to have a nice, neat, folded hem.

I use the below-the knee scraps to create a panel.

Because you don't need a crotch anymore (ha!), cut an inch or two up the crotch, then overlap and pin.  This way, the extra fabric doesn't create a bulge or pucker where you don't need it too.  This is also a good way to hide some wear, as one of the frayed areas ended up being in the lower left buttock quadrant once the legs were sliced up and laid flat.

Here's a fantastic little tutorial that I found that goes into the creation in detail much better than I can.  Once I start sewing, I generally forget to photograph my progress, so I suck at tutorials.   I'm not on Pintrest, but this is one of those patterns that there are a million ideas for variations on.

Me?

I chose crochet.

My legs....they are blindingly white, untouched by sunshine for many, many moons.   At least I remembered to wax!

It was a pattern of rather preciously-named "tiara trim".  It whipped up quick like a bunny, and I basted it in place at the hem before running the machine over it.  I used Rowan cotton denim in "Memphis".

The end result:


Not exactly haute courture. but a comfy, unique skirt that fits around my hips.


Oh, ha.  I can't figure out how to re-orient the images once I've imported them, and I'm far to lazy to fix it.  But here, crane your neck a bit.


It's just become my go-to casual round-the-house, dart-out-for-milk-and-eggs skirt.
 

Thursday, 6 March 2014

A pillow, made of sweaters

I'm finally getting around to a few projects that I've been meaning to tackle.  One of which is turning some ratty old sweaters into something slightly less ratty looking.

When the boxes arrived from Paris, I was astounded at how much clothes I had to deal with.  Especially after living out of my backpack for two months, it really hit home how much in my wardrobe is unnecessary.  It seemed silly to have all this stuff shipped across the channel and then start purging, but being apart from it for so long put things in perspective and I was able to make a few of the local charity shops a few bags of goodies richer.

015

I think Bry has a harder time parting with things.  He doesn't want to throw away anything he feels is perfectly good, even if it looks a bit dog-eared, pilly and worn.  He really only wears the same five or six t-shirts, but he had loads of them- most from various marathons and road races he's run, piles of corporate-branded giveaways, but also a lot clothing from traveling to far-off lands.  Take these sweaters, for instance.

They were supposedly Cashmere- "pashmina" that he bought for very little coin in Nepal.  They weren't particularity soft or well-made, but he loved them and wore them to tatters.  The green one had a pretty big grease stain running down the chin-to-belly zone that I couldn't get rid of, and it ended up slightly shrunk and puckered from my efforts.  The brown one was so pilled, there was no way I could even begin to make it better.  It took a bit of convincing to get him to part with these, but finally, he relented.

I couldn't pass up the opportunity to hone some skills, so I decided to turn the sweaters into a pillow case for a throw pillow.  There are about a million tutorials on how to do this online.  Here is one of that I found helpful.  While I generally find upcycled things a bit too rustic for my taste, this seemed like a perfectly valid alternative to running out and buying something from a store.

014

First, I threw the sweaters in the wash with a pair of jeans, and washed them on hot to felt them.  Oh my!  I wanted the fabric to be nice and firm, without the pillow showing through and without a lot of stitch definition.  They pilled up and shed like crazy, and they ended up shrinking about 25%, giving me not a lot of usable fabric, especially if you take away the fact that the green sweater had that big stain, making the front useless.

I found a pillow form that I wanted to use, measured it, then cut out blocks of the sweater to fit, giving myself an extra inch of seam allowance just in case.  If you can't find the pillow size you are looking for, just buy a larger size, rip some of the stuffing out and sew it back up.  Being able to sew means you can get past all sorts of obstacles.

I hadn't sewn through knit fabrics yet on my machine- you need a special round-tip needle for the job or it will be a bunched-up mess.  I pinned the blocks of sweater together, zipped them together using a zig-zag stitch.  I found it a bit tricky to sew with stretchy knit fabric- I had to be very careful not to pull it along behind the dogs, or it would pull too much tension on the fabric about to be stitched.

The end result:

029

A perfectly lovely pillow for the couch.

035

I used the ribbing of the green sweater to pull tight the envelope of the case, rather than encase the pillow permanently.  I love to be able to throw things in the washing machine on occasion, and pillows are generally one of those things that will just gross me out if it's not given a spin with some soap and water every now and then.  

030

I probably could have sewn a bit more seam allowance, as it is a little loose on the pillow form.  Still, it's not bad-looking, and after a couple of careful passes with an electric razor to get rid of the forest of pills, it is unrecognizable, but a good memento of adventures in far-off places.

I'm looking for a little finishing touch for the pillow.  Maybe vintage pewter or leather buttons, or maybe a decorative topstitch.  Nothing too fancy or elaborate, but I will know when I find it.  The charity shops here are full of good stuff- I've routinely found real wedgewood pottery, tons of Burberry coats, and jars of vintage buttons and spools of thread.  I can't resist ducking in to each one that I come across- I've found quite a few little treasures and I'm filling up my notions box with beautiful, lovely things for pocket change.

The best thing is that the whole project took me about 20 minutes from the time I started cutting to the time I stuffed the pillow in.  Instant-gratification home decor, and it saved sweaters from going to a landfill, so warm fuzzies all around.  I could totally see doing one with a cable-knit sweater and having it look very fab, or layering a delicate lace sweater over contrasting woven fabric.  It almost makes me want to go out and haunt the shops for some more sweaters to recycle.

But I wouldn't do that.